measure hole size
There are these beautiful programs with the exposure time can be the ideal distance between the hole and film plane angle, etc. to calculate precisely. All well and good if you bought a well drilled or laser cut pinhole, but how do you calculate the diameter of a hole made by hand?
The analog options
After the hole punched, trimmed and cleaned down, you put it into either a magnifying device, or in mounts. The projector or the V-device is using a transparent ruler, etc. set to eg 1 cm in the magnification is 10. Now can measure the projected hole easy. 5 mm correspond to 0.5 mm, etc. ..
Digital measured with the scanner
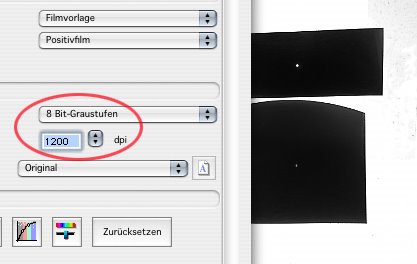
This one scans the pinhole in the highest possible resolution, dpi from 1200, and then opens the file with an image editing program (Photoshop, Photoshop Elements, Gimp, etc. ..). It should be noted that the units of the program be adjusted accordingly. With the selection or measurement tool now, the size of the hole can be determined. The higher the scanning resolution, the more accurate the measurement result. A downer & Co. in Photoshop that can accurately read the values only in tenths of millimeters. Exact it comes with Illustrator or Freehand.

The scanner preview with the specifications. The top rectangle is a thin metal foil from the craft store. Including a piece beverage can. The metal pieces should be as flat as possible on the scanner. I have set to film original and positive film to get a nice contrast.

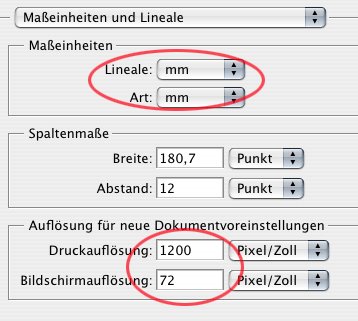
should be set the same parameters as in the scanner in the program requirements of image processing. drawn

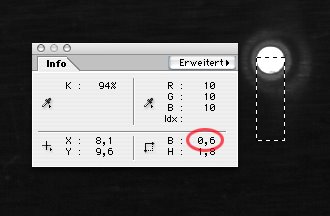
With a selection box over the scanned hole, can be read off the diameter. The hole in the metal foil has a diameter of 0.6 mm. Unfortunately, Photoshop only one expressed in tenths of millimeters. If the hole size from a tenth of values, one can also assess whether the size is closer to 0.55 or 0.57 mm.

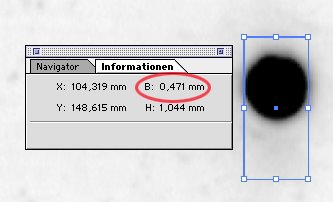
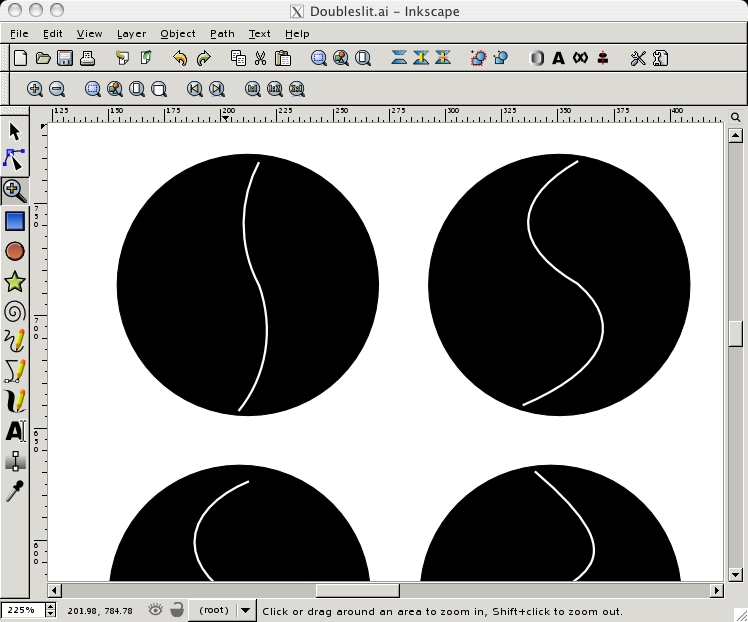
More can be the diameter of a graphics program such as Freehand, Corel Draw or measure as shown here with Illustrator.
This hole I gesannt with 9600 dpi resolution and then open in Illustrator. Who has none of these programs on the computer, can perhaps get a demo version or knows someone who has installed it, and may be Pinhole sufficiently accurately determined.


My pinhole on blinding camera
panoramas and transition effects on a cylindrical surface
The original idea this camera was a 360-degree panorama. Dieter Bublitz has to his pinhole camera page a drawing that describes the project, and with further research on the web you come across similar constructions that have been partially completed. For all cameras are more apertures (3-8) needed a kind of Panorama expose.


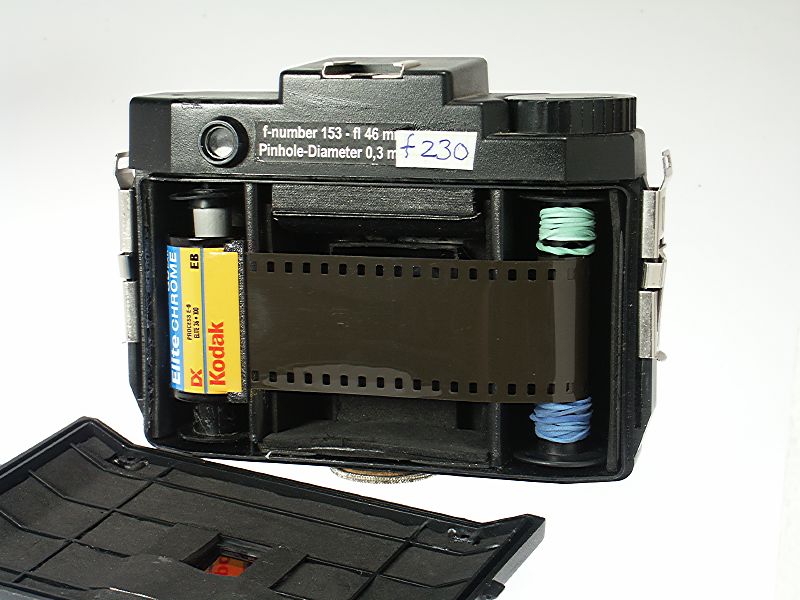
My design is limited after several attempts to only one aperture: it turned the camera after the roll film was exposed and transported. This process is very similar to the approach for panoramic images, which are assembled by stitching technique. However, the fading will take place in the camera, not behind the software.
The schematic drawing (top left) illustrates the principle of Dieter's construction. In addition, my simplified version. In the version I have converted a 9 x 12 sheet film cassette for roll film cassette, which I use in my under large-format camera , The spools are made within this halved the cylinder. To download the movie easily, the inner part is removed (bottom photo), here with inserted test film.

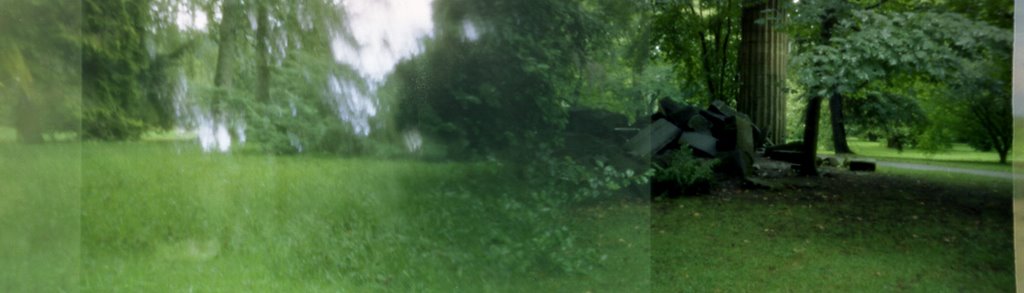
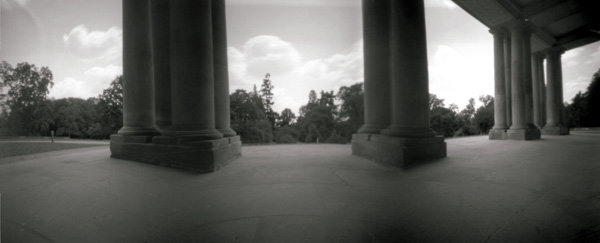
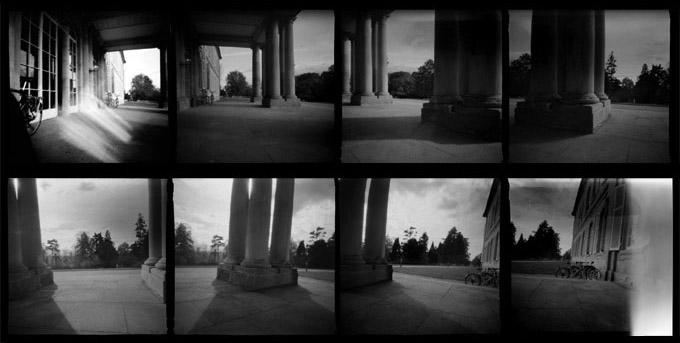
The upper Panorama (Courtyard, Castle Hohenheim) you can clearly see the weaknesses these complex constructions: in the overlapping areas of dark stripes occur. Slightly less at the lower falls on this panorama of the columns, and I have tried each of the center of the exposure to place between the columns.
Upper Panorama: 5 exposures on roll film, lower Panorama: 3 exposures on roll film.

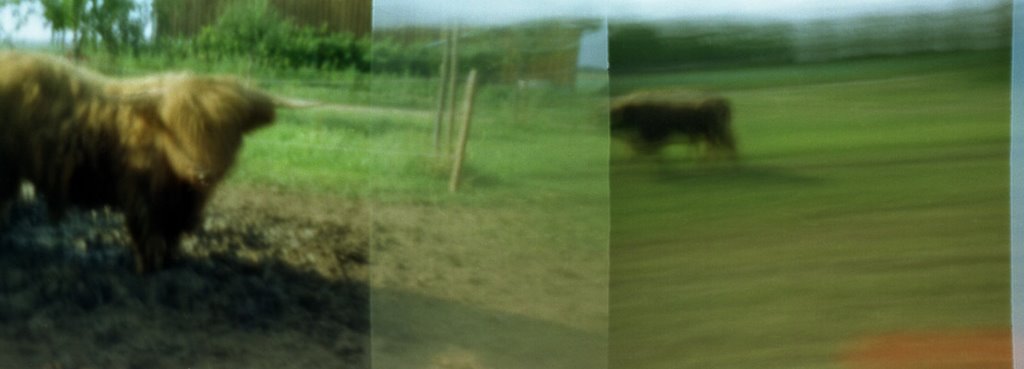
If you do not take turns in 60 degree increments exposed, but more or less arbitrary motifs sequentially receives, photographs created as above: front pushed left an exposure of the memorial stone in the middle of the bicycle and the third exposure the right is taken up again in another place.
anamorphic images with the Pinholekamera I
perspective extreme!
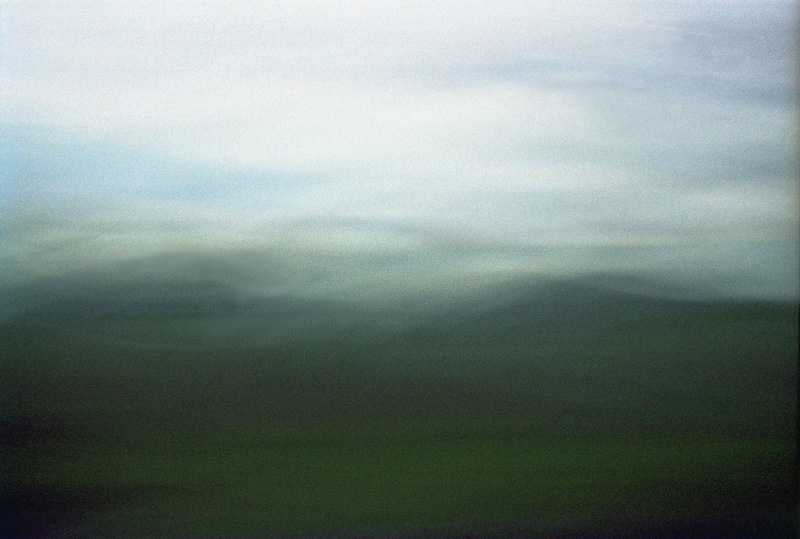
 view from the skylight. Through a pinhole in the lid of a tea box recorded Photo.
S chon from 16 Century painters dealt with this kind of perspective. The image / drawing showed only makes sense if you have a cylindrical mirror in the middle and put in this then the subject considered.
applications
An anamorphic lens is a lens, the anamorphic images produced: it is used as the "film" is a broad picture on a narrow format to compress, and then again in the projection on " be widescreen equalized "to.
pinhole means for Pinholefotografie this mean that the hole is placed in the lid of a cylinder. The light then falls on the inner surface of the cylinder shell and leads to extreme distortion of the subject.
exposure, processing
is not quite so easy to find the correct exposure. While at the top of the film / Photo paper, the distance is relatively small and requires only a short exposure time, one would need at the bottom of a multiple of this time for a proper exposure. If adopted seven ASA for the photographic paper resulting in sunshine an exposure difference of about 20 seconds to 10 minutes. So it is important to find a compromise and in the darkroom or the image processing on the computer hard nachzuhelfen to achieve a reasonably usable result.
can be helpful in this process, or technology, under the name DRI (Dynamic Range Increase), or operate HDR (High Dynamic Range). For the above photo I took while scanning once "exposed" to the depths and once on the lights and then with the software Photomatix Basic (available in this limited freeware version) and copied it. can also be similar with Photoshop Results.
Unfortunately, it is with my camera dose not possible to produce different exposures on film and then to work with the already mentioned methods.
paper size 13 x 18 cm
clearance hole / Photo paper about 35 mm - 120 mm
hole diameter 0.3 mm
cover approximately 116-400

In the tea box I have long pieces of cardboard glued to a sheet of 13 x 18 cm photo paper exactly edge to edge fit .
Show my cameras V
format -
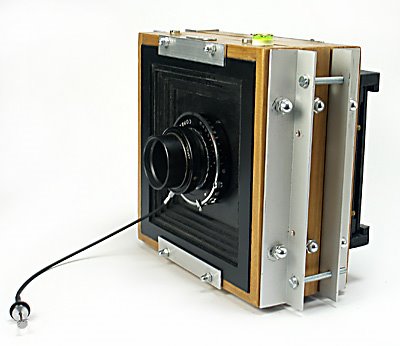
frame module camera in the 4 x 5 inch large format

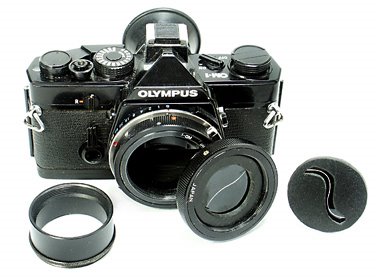
nspiriert
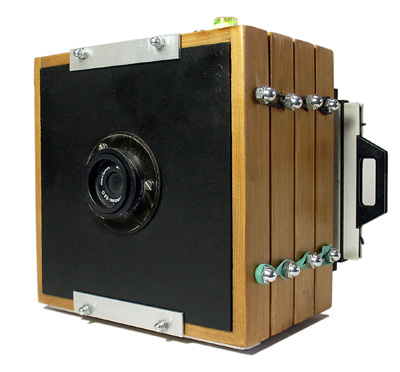
I by the multi-format camera by Zero Image, I have my own little by little "system camera" was developed and constructed with an open end. The principle is simple: because you do not focus a pinhole camera by means of a bellows must be extended to extract reciprocally uses pluggable framework, which are held together with rubber bands. On the first frame at the bottom of an aluminum flash bracket is attached with a tripod thread. The "lens board" is 3 mm thick made of black polyester. Then I placed the worn centered round an enlarger board with 42 mm thread, it can take either the lens Obscura-set or the T2-adapter. The two aluminum rails for fixing the plastic plate from the wood of the frame glued 4 mm machine screws, which I had sawed off the heads kept. The rubber bands I've hung in 6 mm screws that are inserted from the inside. The mother is the head of a round Conclusion. For easy alignment, I glued up a level (spirit level) on the frame.

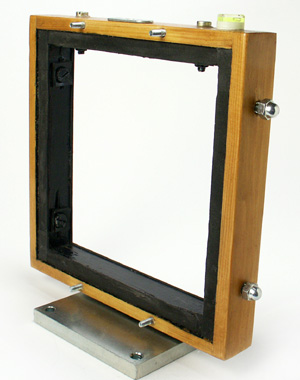
on the inner, black-painted frame, I have front and rear glued foam rubber strips to improve the light leakage. It would be possible as well be black felt. The dimensions of the frame are suitable for sheet film cassettes or constructs the Polaroid pack film cassette. I have taken as an inner diameter of the outer frame 170 mm x 170 mm. The "lens board" has therefore the same size, everything else follows from the use of wood. A module is 30 mm deep, thus resulting "focal length" of 60 -, 90 - and 120 mm. These range from completely normally. The more context, more unstable and heavy and therefore difficult to handle the construction.

replaced with 2 frame is a wide-angle camera with an angle of about 108 degrees relative to the 4 x 5 inch film format.

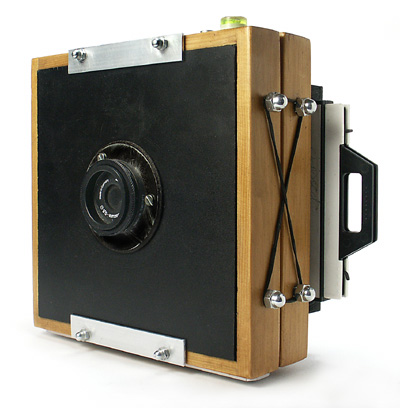
is properly stable, this design by using aluminum L-profiles, which are fixed with machine thread screws. Here is the version with 3 frame (90 mm) and Copalverschluß zone plate combination. To compensate for the larger clearance hole / film, caused by the closure, I have the "lens board" built back inside.

A 70 mm deep extension is used for inserts. In the above example is one half of (Papp) cylinder in a sheet of 13 x 18 cm photo paper or film fits. So it is practically the "doses camera" inside my "system"
 Slitcam I
"sharp things" - slit camera A variant of Pinhole and Zone plate, the slit camera. In the T2-adapter I mount instead of the zone plate, the halves of a razor blade in 0.3 mm Distance. - If the slot is as long as the film format, everything is resolved in horizontal or vertical lines of color - it is clearly nothing more.

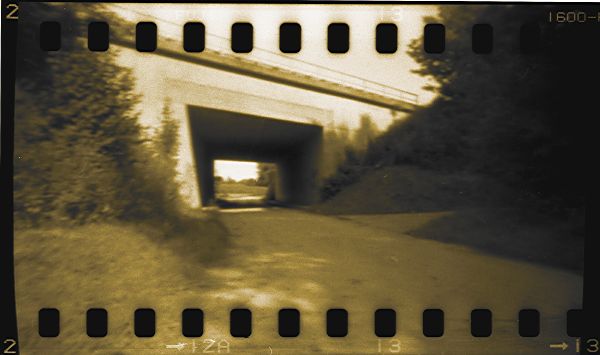
In the next example, the slot is shorter, the shadowy outline of the avenue trees looming. Would be reduced to the square, the resulting image would be similar to that of a round pinhole. In the right picture I shortened by cardboard mask to 2 mm. The result is the approximation to a receptacle with a hole.
A small gallery of images from "Slitcam" I have to flickr published.
"pinhole stitching
blend of analog and digital technology
 meet here together old analog technology with modern computer technology . Sacrilege for "pinhole"? I had to try it! After initial experiments with the stitching digital camera I was doing a SW-roll film in the just newly arisen and "pinholisierte" Holga . with tripod and ball head, I then made my shots, each by 30 degrees horizontally turned further. After developing and scanning the big moment. The individual images were loaded into the demo version of " Panorama Factory " - the result is amazingly perfect at the first automatic pass. The software (An older version is available as freeware as here) is probably good for beginners. The last picture I have drawn out the Lochset something by mistake, hence its light ...
 8 individual recordings via software "stitched together" (stitching)
 Zone Plate
Blur
on a piece of film
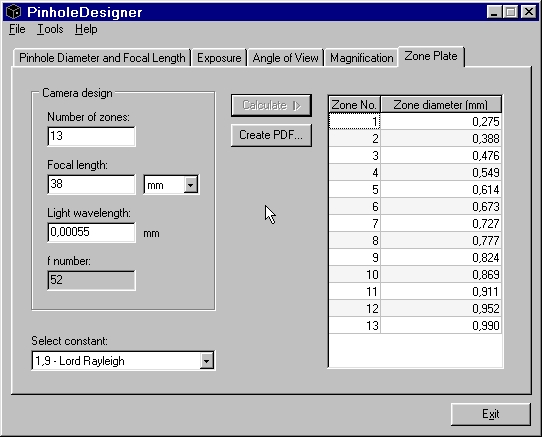
 The "PinholeDesigner" goes I think the easiest way. Man wearing a the necessary parameters and can can be created by the program a PDF. Printed on good paper and photographed the print on Lithfilm at right angles, (the scale can be under the tab "Magnification" calculate distance camera - expression) developed and completed, the zone plate. When KB-I think this movie has only the Kodak Technical Pan. If Repro is a device for magnifying device, and "slash film is also a possibility.

The Pinhole Designer David Balihar a freeware program for Windows computers, which can calculate almost everything around pinhole and zone plate photography.
I went a third way. Since I did not know the Pinhole Designer, I have a template that I had found on the Internet, in the graphics program increased traced and a service bureau, which produces films for offset printing, where my free hand file for the exposure.
And who wants to save all the drudgery, can such a "zone plate" buy now, too.
Zone Plate and closure
The "zone plate" with their increasingly narrow translucent circles around the actual hole around is "brighter" than the pinhole. The exposure times are more in tenths of a second range. It is therefore advisable to work with closure. Suitable for this miniature cameras just fine. But of course, medium format cameras that can be attached instead of the appearance a "zone plate". In large format it is somewhat difficult, because here a separate closure required.
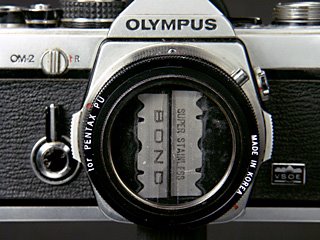
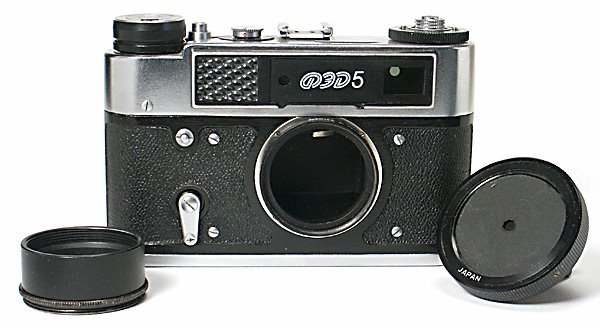
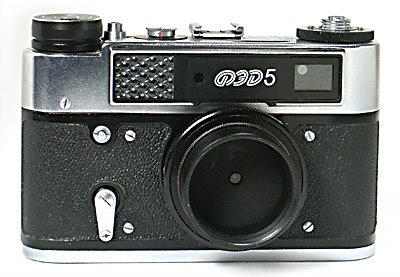
My cameras IV - FED 5 as a zone plate camera

FED 5 -
miniature camera from Kiev with Leica thread - my Zone Plate "camera.
No direct Leica clone, this fully mechanical Ukrainian, but the design just a little reminiscent of the legendary role model. In the 39 mm Leica thread "I screw an adapter ring 39 - 42 mm. These then comes the T2 adapter (right) receiving my zone plate, a piece Lithfilm with transparent hole and always close becoming also the transparent circles around it. In order to fix the "zone plate" I use a screw ring 42 -39 mm. Finally, I turn another 20 mm, an intermediate ring 39 mm thread diameter, which serves as a sun visor. Between this ring I can use directly on the case as an extract extension.
course, also fits the lens Obscura-set with 42 mm adapter ring into the camera body. The advantage of this search model is that "everything" in a compact form it has. It has a built-in selenium light meter that does not even need batteries, a tripod socket, self-timer, cable release connection and a mechanically running cloth shutter from 1 to 1 / 500 sec and B.
 film formats - 24 x 36 mm film
distance hole / film - 38 mm
angle - 59 degrees
hole diameter - 0.275 mm (Zone Plate)
panel - 52 (Zone Plate)
bases
exposure time - the formula
By the time you get some experience to approach the correct exposure time. But here again the spirits of divorce. Experienced hole camera photographers work with the feeling of not having the computer say some. The others prefer to rely on measured values and formulas.
The mathematical formula for calculating the exposure time is:
image distance divided by aperture diameter = light intensity.
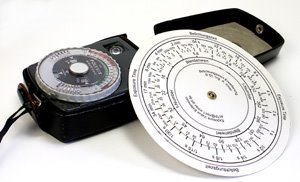
on our example image distance (focal length) divided by 100 mm aperture diameter 0.3 mm is 333.33. must obtain in order for the pinhole camera from the exposure level to expand the scale of the exposure meter. There are also some templates, such as the slide rule by Dr.-Ing. A. Irmer as PDF file (see photo)

A measured exposure time of 1 / 30 sec. at f/22 in Aperture is 362 (the next value of f 333) 8 seconds. The wars, however, unfortunately not. Now comes to the Schwarzschild effect. For exposure times from 1 second, namely films behave differently than in "fast" times. One must allow for an extension factor that differs from manufacturer to manufacturer. In Ilford it is in our example, the factor 2 (8 sec). Our exposure time would thus be equivalent to 16 seconds. Fortunately, negative films are quite tolerant. But it's no good, reproducible results must be tested, or you have a very good "gut feeling"
The exposure helpers from the Web
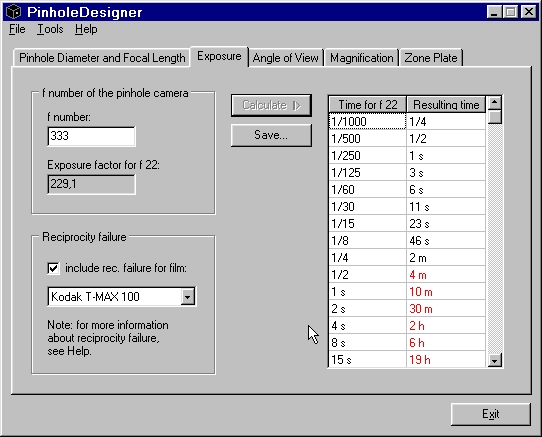
There are some sites with small Java programs that help the exposure time calculation, and there are freeware programs you can download and install. The program is certainly the most versatile PinholeDesigner David Balihar.
 the Pinhole Designer some popular films with previously unrecognized Schwarzschild correction are preset. The resulting times can secure a table.

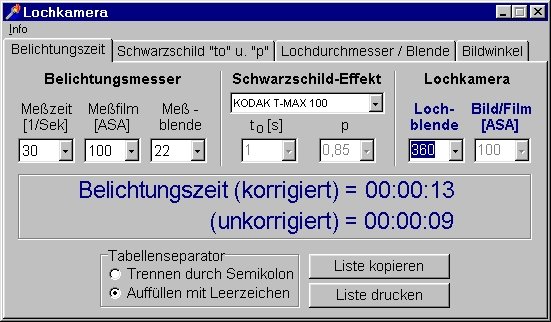
is also very well done program by Michael Ratzkowsky "pinhole camera" . Also here you can print lists, taking account of the Schwarzschild effect common film marks are given.

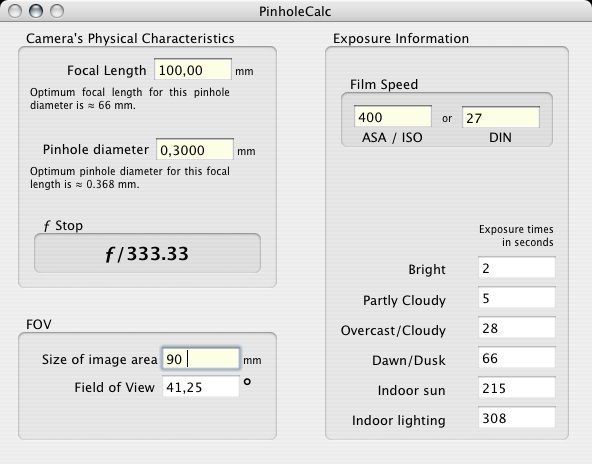
For Mac OS X there is a pinhole calculator. PinholeCalc is a little freeware program that enables the to calculate all the important functions of pinhole photography, though not as extensive as the PinholeDesigner for Windows


